How to create a MCP server and MCP tools from scratch?
Table of contents
How to create a MCP server and MCP tools from scratch?
Why Would We Want to Create a MCP Server?
Creating a MCP server allows us to connect an LLM or AI to real-time data, personal data, or other data sources.
I previously wrote a post where I explain how the Model Context Protocol (MCP) works internally ; you can check it out if you’re not satisfied with just a recipe and want to learn more.
In this post, I’ll detail how to create a MCP server. We’re going to make one that solves one of the most embarrassing LLM errors: not being able to count the number of r’s in variations of the word strawberry. For example: strawberrrry or strawberrrrrrry.
If you’re not a bot, you already know that counting letters is a pretty trivial task for a human.
On the other hand, for an LLM it’s almost impossible due to how it works—based on tokens. AI can create art and code , even though it isn’t a consciou entity , but it can’t count letters. Contradictory, isn’t it?
For now, we’ll turn this into an educational exercise on how to deploy a MCP server.
Requirements to Create a MCP Server in JavaScript
We’ll start with a Node installation—you know, the result of running: npm init -y, and we’ll create the index file using the Linux touch command
.
├── index.js
├── package.json
└── package-lock.json
Set package.json as a Module
Inside the package.json file, change or create the type property and assign it the value module, so npm treats it as a module.
"type": "module"
Install the Library
A MCP server requires
the official MCP server SDK
, just install it via npm.
We also need zod, which, if you’re unlucky enough to use JavaScript, is used to validate data.
npm install @modelcontextprotocol/sdk@1.16.0 zod@3.25.76
Create a MCP Server
Afterward let’s create a MCP server just initiliazing a new McPServer object
import {McpServer} from "@modelcontextprotocol/sdk/server/mcp.js"

const server = new McpServer({
    name: 'Strawberry Count',
    version: '1.0.0'
})
Create MCP Tools in a MCP Server
Next, we’ll define the tools, or mcp tools, that allow us to receive a parameter from the LLM so we can do whatever we want with it—in this case, count the r’s. I already talked about mcp tools in my introduction to the Model Context Protocol.
// server.tool("<Name>", "<Description>", {
server.tool("Strawberry Count", "Count the number of r's present in a strawberry variant", {
    param: z.string().describe("The strawberry variant, it can have a variable number of r's")
},
    // callback with the param
    // AI will detect this param
    async ({ param }) => {
        return {
            content: [
                {
                    type: 'text',
                    text: `The word has: ${param.toLowerCase().split("").filter(letter => letter == "r").length} r's`
                }
            ]
        }
    }
)
One thing to notice here, we’re counting the r’s manually—no tricks whatsoever. We process the string we receive and return the number of r’s.
Also, I want to highlight how awesome is the dark magic that the LLM uses to get our custom param. Our LLM detects the param that we want to receive from the user’s input using as context the description information that we passed to the describe method.

Obviously, your mcp tool won’t do something as useless as counting r’s—you could fetch data from an API, process it, get info from the file system, or even from another LLM—whatever you want.
Where Does the LLM Get Its Context From?
For this example, we’ll use STDIO (Standard Input Output). But in the MCP introduction I talked you a little bit about its alternatives: SSE and HTTP Stream.
In this case, it’s basically the user’s text input.
const transport = new StdioServerTransport()
Run the MCP Server to Read from STDIO
Now we’ll connect this transport to the MCP server so it can read directly from STDIO.
await server.connect(transport)
Connecting the MCP to Other Applications, like Claude Desktop
We can connect this MCP server to any program that supports MCP so we can use it.
For example, for Claude Desktop we would fill out the claude_desktop_config.json file.
Notice how we declare that the MCP server should run with the npx command followed by the list of arguments in order.
{
    "mcpservers": {
        "name": {
            "command": "npx",
                "args": [
                    "-y",
                    "node",
                    "<full_path_to_js_file>"
                ]
        }
    }
}
If you wanted to use TypeScript instead of JavaScript, you could do something like this:
{
    "mcpservers": {
        "name": {
            "command": "npx",
                "args": [
                    "-y",
                    "tsx",
                    "<full_path_to_ts_file>"
                ]
        }
    }
}
Analyzing the MCP Server with the Inspector
How we test that our MCP works? Claude’s inspector lets you test and debug MCP servers. You can view the tools you’ve created and simulate their function—however, these don’t use an LLM. It’s a plain server, functioning as if we were the LLM.
To run it, you can use npx and pass the server command:
npx -y @modelcontextprotocol/inspector <mcp_server_command>
I wasn’t able to run the command using substitution. I tried using the relative and absolute directory, but I couldn’t connect to the server—I’m not sure why.
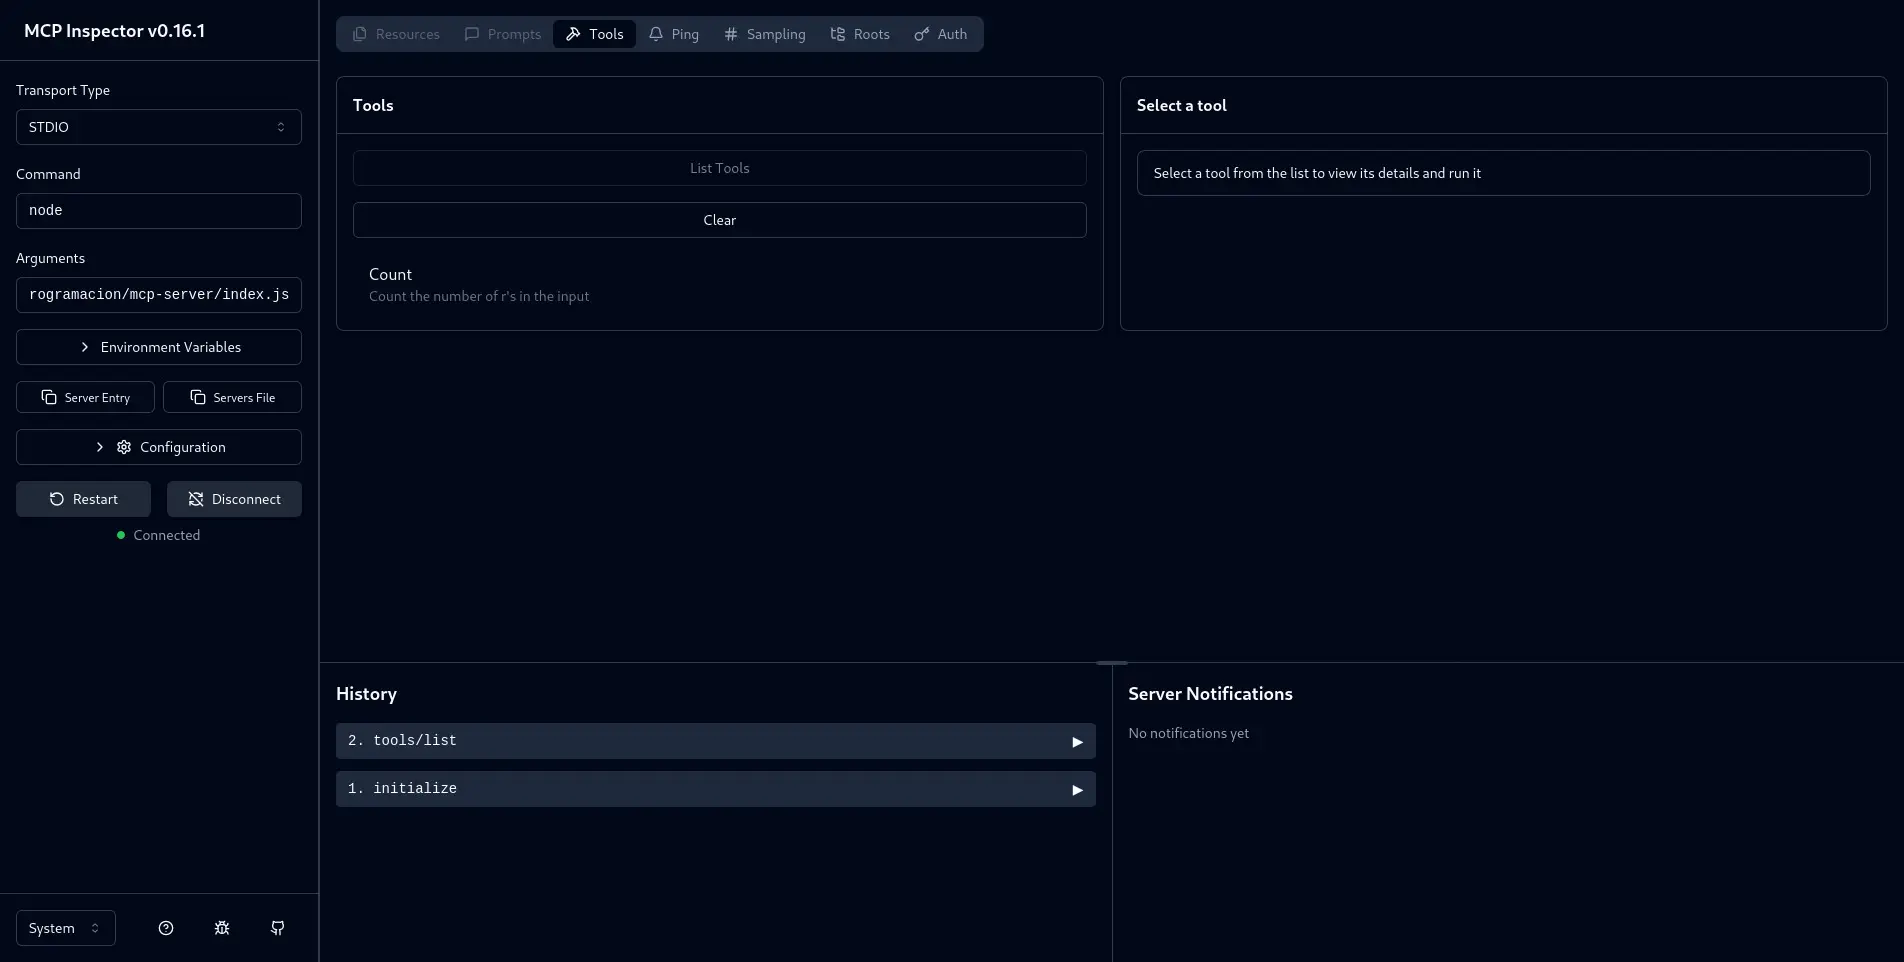
However it did work by manually filling in the data in the Inspector’s graphical interface.
After running the inspector, we’ll have a server running on port 6274 (by default, though this can be changed).
npx -y @modelcontextprotocol/inspector npm index.js
npx -y @modelcontextprotocol/inspector npm /home/dir/mcp-server/index.js
Next, fill in the transport type and commands in case you had the same issue I did.
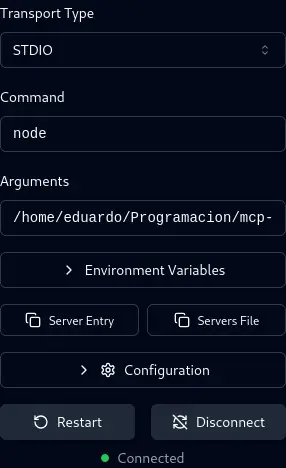
If we click on “list tools,” it’ll detect the tool we just created.
By clicking on List tools, and then on the name of the tool, will activate and we’ll be able to pass it our parameter: a strawberry variant with as many r’s as we want.
Just remember, this parameter is what we’d receive directly from our LLM—it would be the one responsible for parsing the user’s input and returning the parameter accordingly, so don’t mess with the input.
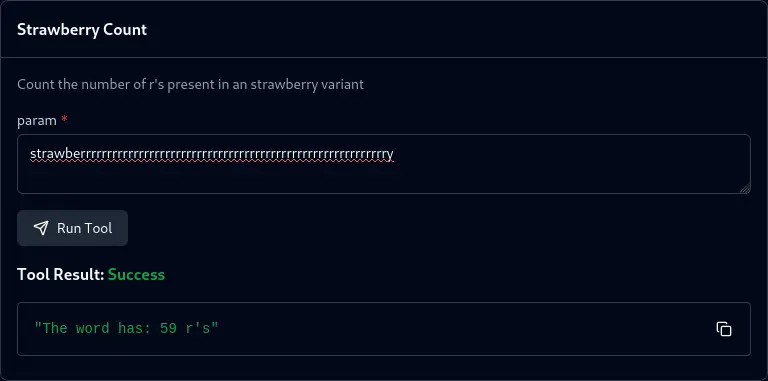
As you can see, the code works. The MCP server returns our message. In a real-world setting, this would be received by the LLM and would tell the user the correct number of r’s in their strawberry variant—without making a fool of itself, as it usually would normally do.
Related posts
-

-

-

-

-

-